I don’t often take photographs of hoverflies, first off, they rarely sit still long enough for me to get a shot. Anyway, I was trying to find butterflies* to photograph at Trumpington Meadows, near Cambridge, and bumped into one the university profs carrying a net. He was hoverflying. We had a good chat about insects.
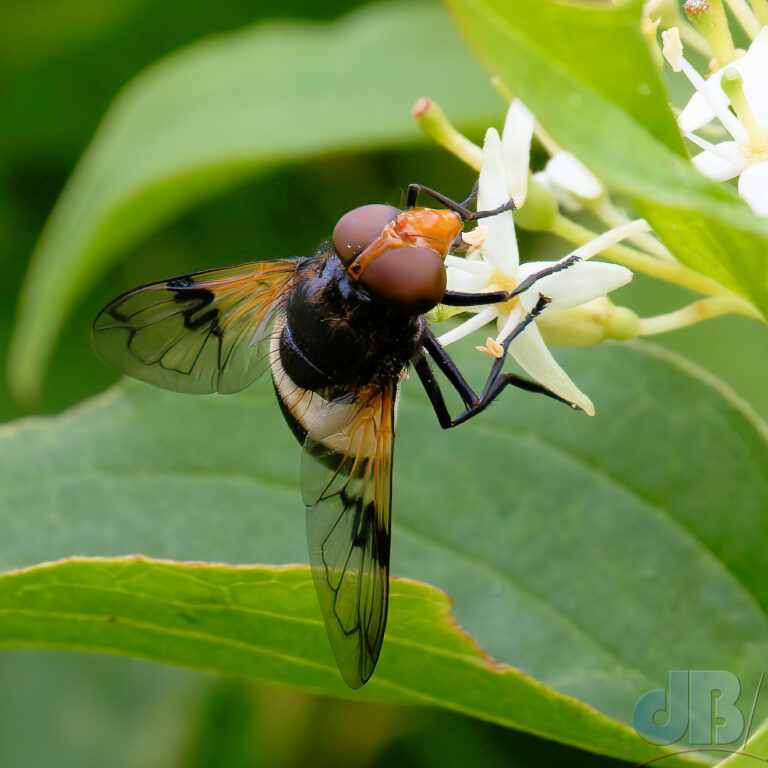
I later shared my photo of a Pied Plumehorn hoverfly, which I’d snapped a little after we went our separate ways. He seemed to like the photo and asled me about my photographic equipment, he having gone from a Canon 60D dSLR to a mirrorless R5, and wondering about getting better results than he was.
Well, I’m still using a dSLR, a Canon 7D mark ii. On this occasion with a Canon 70-300 4-5.6 IS lens. I usually carry a Sigma 150-600 for birds and have a Tamron 1:1 90mm macro for studio shots of the morning’s moths and other subjects.
I have toyed with the idea of switching to mirrorless, but I only bought the 7Dii a couple of years ago and the expense of a new camera puts me off, especially, when I don’t think the equivalent price model can beat the 7Dii yet on various features and image quality, as well as in terms of weather and dust proofing. There is also the issue of staring at a screen through the viewfinder rather than seeing the image through the lens. Oh, and the delay between switching on and the camera being ready to shoot.
The 70-300mm lets me focus from about a metre away from the subjects, which is usually fine if you’re cautious with butterflies. The 600mm was a challenge as it has a 3m minimum focus and although it’s about the same weight as 70-300mm lens, it’s a lot shorter. The photos I’m getting when I can get close with the 300mm are better quality than my 600mm shots.
I generally use DxO PureRaw3 to denoise my photos and get them into jpg format for editing. It gives you about 3-4 stops of ISO in terms of noise reduction, which is amazing! I also use Topaz AI Sharpen, which is magic for some images at removing motion blur. I don’t always apply the Topaz processing
My final step is to use PaintShopPro as a cheap alternative to PhotoShop to adjust levels, saturation, vibrancy, and to do a final crop, resize if appropriate for social media and web, and then add my logo.
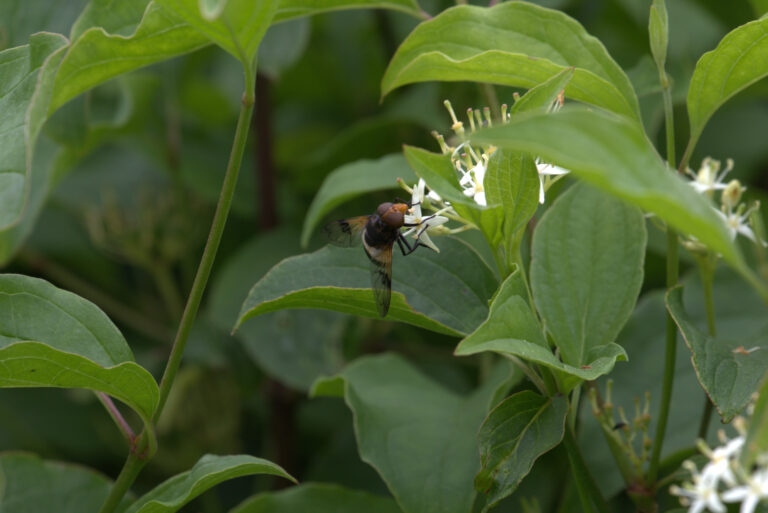
Below is the unprocessed copy of the hoverfly photo so you can see roughly how it came out of the camera…the edited version is only 1300 pixels across so would be printable at just a couple of centimetres across, it’s perfectly fine on a web page, instagram or for sharing by email. I recently wrote about my process as I apply it to butterfly photos.
Please note, my blog software is set to resize and compress photos so they’re all 768 pixels across rather than the native size.
*I saw a couple of dozen Meadow Brown, seven or eight Common Blue, a solitary Small Blue, just one Small Health, a couple of Burnet Companion and two or three Silver Y moths