TL:DR – Tips on choosing which photo to process how to denoise and sharpen software, adjust levels, and crop.
Recently, I wrote about the beautiful Short-eared Owls that turned up on our patch over-winter in the slightly warmer climes of the Cambridgeshire Fens. I got photos of three hunting in the hour before dusk. The photos were okay, but I knew I could make them better with a few simple tools.
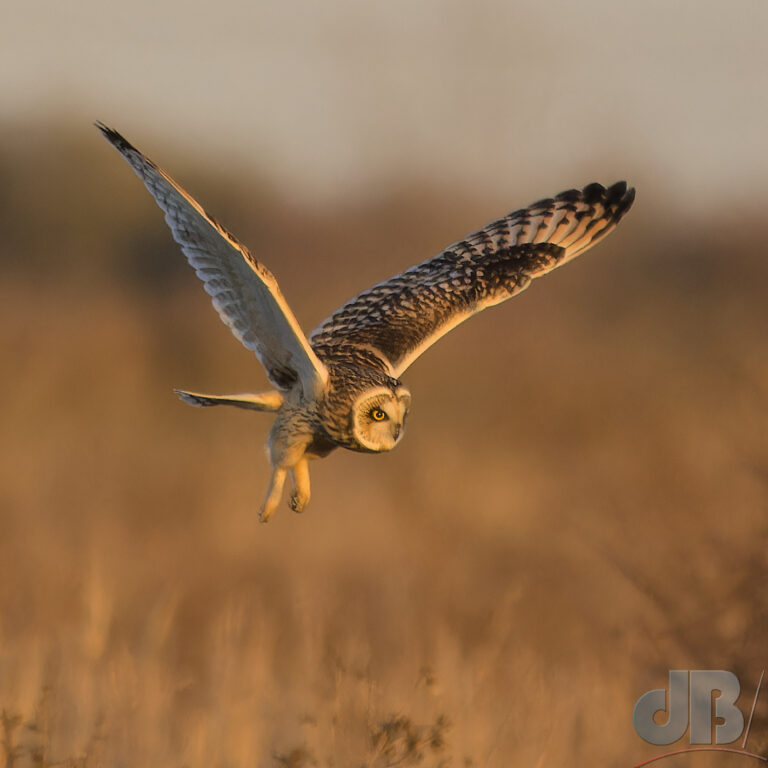
UPDATE: The SEOs are back. At least six of them on the fen. I got a few more shots late November 2023 including this one of a grumpy-looking Shortie that had just missed catching a vole.
The problem is always hand-holding a big lens when the light’s fading. There’s camera shake and a short shutter speed is also needed to freeze the action. This adds up to the camera switching up the sensitivity, the ISO, and that makes for more photographic noise.
So, what can you do to improve a noisy photo that might also have a bit of motion blur. First off, you must make sure you’re shooting in RAW mode. RAW mode lets you download what is essentially an unprocessed digital negative of the photo you took.
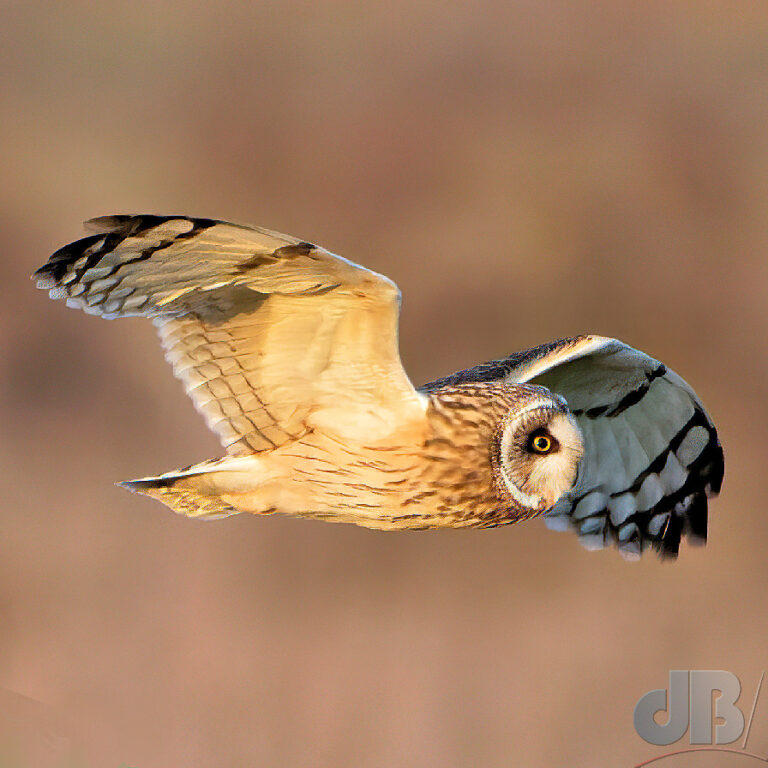
I’ll run you through what I do with the RAW files out of my camera. First, I select from the photos the one I think is the most dramatic or has the most character, the best light, the sharpest. I also try to pick one that doesn’t have distractions like foreground twigs or foliage or a cluttered background. Often your choices are limited with bird flight photography as the birds appear on their own terms and where you happen to be standing at the time determines a lot of that. A slight movement left or right might help sometimes in terms of foreground and background.
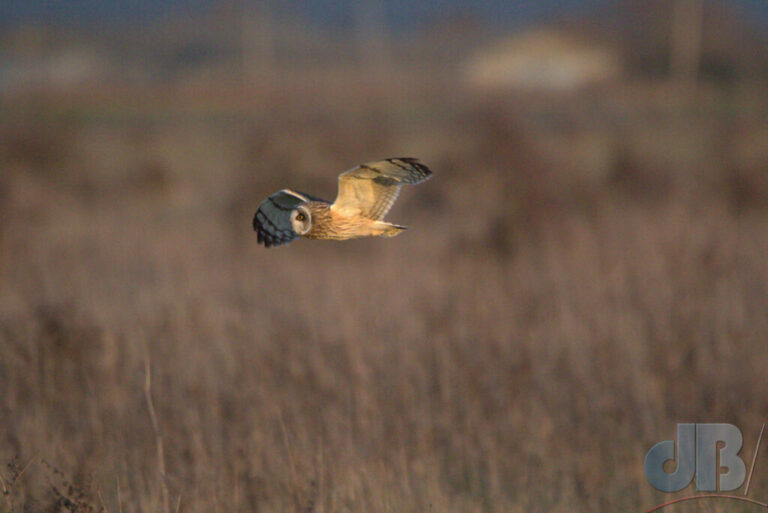
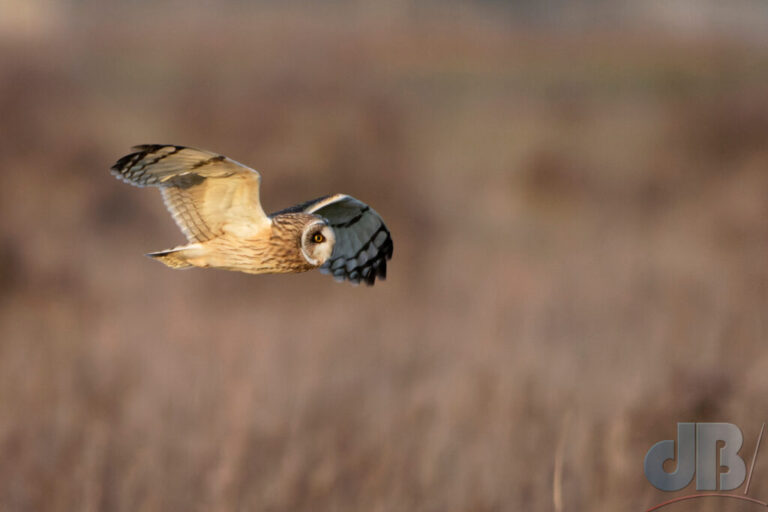
So, I’d picked this photo as the best of one of the owls flying in front of me. It was fairly close. Background isn’t too bad. The blurred building in the background almost adds to the composition although might have been more appropriate if it were a Barn Owl. That stem in the bottom left is a distraction and could do with being removed. We’ll see.
The original photo was shot at 600mm zoom, 1/3200s shutter speed, f/6.3 aperture and ISO 6400. That ISO number is way too high and I might’ve got a similar result if I’d used a slower shutter speed to get the ISO down a few stops.
I resized the photo to fit the website, but other than that with this first view it’s not cropped nor processed or edited other than a basic RAW to JPG conversion to make it displayable and to add my logo. The website loads the image as 1024 pixels wide with a JPEG compression of about 90%. It’s quite noisy, not as sharp as it could be, the levels (contrast, brightness, saturation etc are not optimised). And, in terms of composition, it’s not how I’d want the final photo to look.
TOP TIP: Push the sliders on whatever adjustment you’re making to the point where it is immediately obvious that you’ve made an adjustment and then claw them back ever so slightly. This way you will hopefully avoid making the photo too painterly. If you’re having to push anything beyond about 12% of the way up, then it might be worth abandoning the photo, unless you’re after a painterly effect.
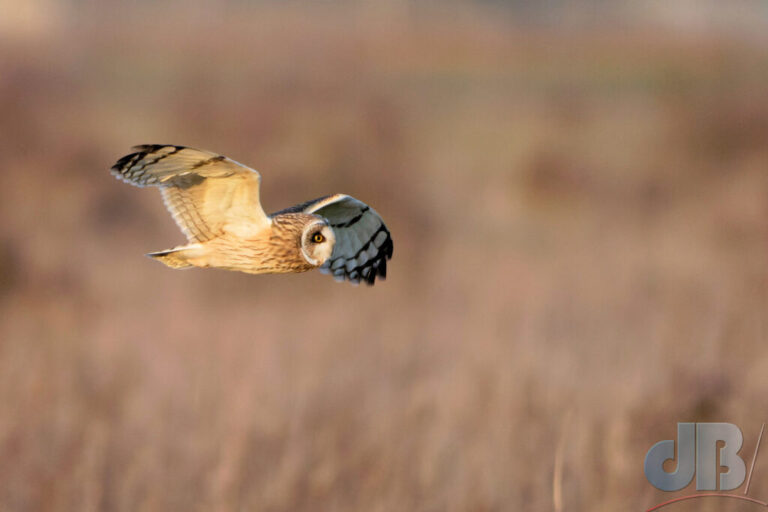
So, stepping back I first feed the RAW file to DxO PureRaw. This removes a lot of the noise from any photograph really well. It also applies basic corrections that are known to be needed for the specific camera and lens setup used. I’ve zoomed in on the program in action so you can see, on the left just how noisy the photo was originally, and in the right of the frame, how well the noise reduction works.
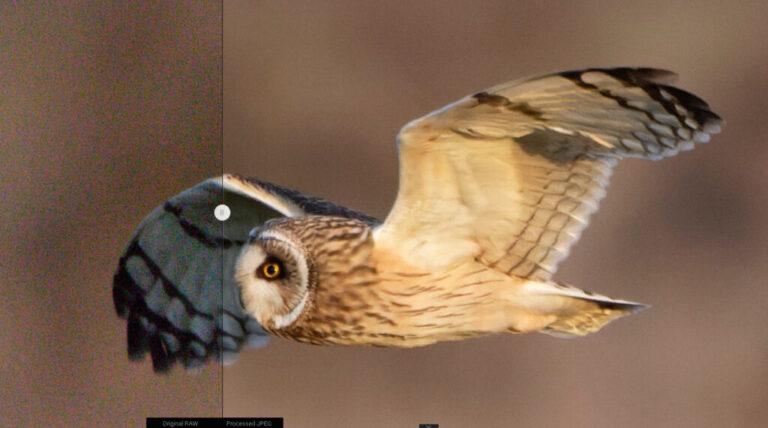
The frame below is that same image saved in DxO PureRaw. Hopefully, you can already see some improvement from the original RAW capture above and displayed at the same composition. PureRaw lets you export as a DNG file, which is like a generic RAW format so you can do the subsequent processing as if the file were fresh from your camera.
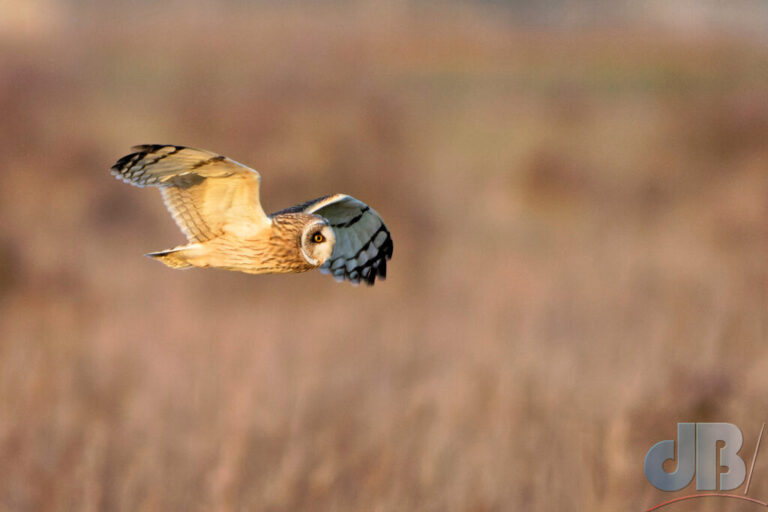
At this point, I generally make an important choice. I can either simply open the denoised image from DxO in my photo-editor (PaintShop Pro) or add another step and open it in Topaz Sharpen AI. This software does denoising too but it can also sharpen and remove motion blur. Either way, at this point, I would first crop the image to give me the composition I would like in the final image and perhaps mirror the image so that the subject is facing in a more pleasing direction (flying left to right is better to my eye than having the bird fly off to the left.
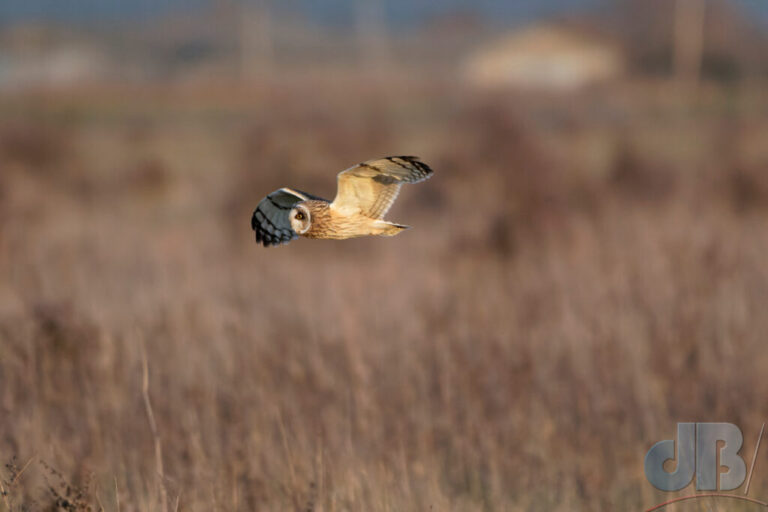
The following photo is cropped and reversed to give me the composition I am after. I’d usually do a square crop for Instagram.
I am quite happy that this image is fairly sharp and so I won’t apply Topaz in this instance. Instead, I will use PSP to adjust various parameters: Overall brightness (raised 14%), shadows (up 10%), and highlights (no change). Saturation up 8%, Focus/sharpening up 66%. I’ve left the white balance as it was. I then brought in the blacks by 6% and the whites by 4%.
I then raised the vibrancy, which is an adjustment related to saturation but slightly subtler, I gave that a 12% boost, which I think gives the photo even more of a “golden hour” glow. Also added a few percent of “fill highlight” and boosting “clarity” by about 10%.
That grass stem sticking up from the bottom right is a bit of a distraction, so I removed it using what PSP calls the Scratch Remover tool. PSP also has a tool called Magic Fill which can do a much better job of removing objects from a photo if they’re not simple, thin lines.
Once all that’s done, the final couple of steps are always to apply a moderate “unsharp mask” to make the final image even crisper and then to add my dB/ logo.
So that’s probably as far as I’d take it. To my eye, it looks fine. At the very least, it looks a whole lot better than the RAW original, but that’s to be expected, you don’t expect to look at negatives instead of prints of photos. All photographs have to be developed, they always have been, in the digital age, we have more sophisticated tools to do the job for better or worse.
When looking close up at the originals (pixel peeking), I can see marked improvements with each stage of the above processing and would be confident that cropped closer it would still print nicely in a print magazine, screening at 300 dpi, at up to 6 inches width, but perhaps no bigger in this case.
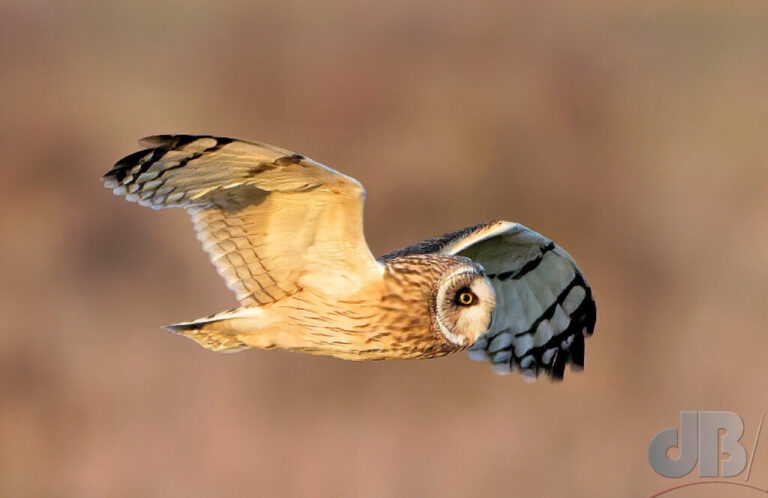
Just for completeness, I did do a Topaz process on the DxO output and it does reduce the speckles of noise still further. However, there was also a bit more of a loss of detail. The image below was DxO then Topaz and then the same PSP processing as before. I cropped it a bit tighter for what I might use as a photo to accompany an article about this species, or owls in general, showing a bit less of the fenland background.
Instagram-ready version below
DxO and Topaz are the leaders in terms of denoising at the moment, I’d say. I prefer what DxO does though, but Topaz has the sharpening options that DxO PureRaw lacks. I trained on Photoshop but have stuck with PaintShop Pro for editing for many years, PSP has almost all of the same tools as Photoshop for the basic processing I do. Lightroom has advantages and there are, of course, many alternatives out there to all these programs. I must confess that I usually use SnapSeed for photos on my phone and sometimes for a landscapes, architecture, flowers, moths etc. I might do use the above workflow but then open the file on my phone in SnapSeed to bump what that app calls “Ambience” and “Structure” and adjust saturation a little more.