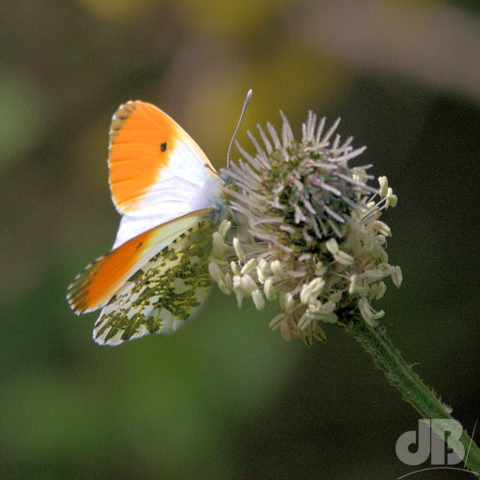
When the first Orange Tip of the garden year turned up just moments ago, I grabbed the nearest camera and rattled off a quick burst when it landed briefly on a wildflower (weed) in the garden. Pre-programmed settings on a Canon 7dii with a Sigma 150-600mm lens pulled to 600mm. 1/1600s, f/8.0, auto ISO jumped to 1600. No chance to do any bracketing or exposure compensation, before this male had flown. So, thank goodness for shooting in RAW.
RAW mode saves all the data your camera’s sensor detects. There’s no processing in the camera, you have to pull the RAW file into appropriate software and convert it to a format that you can then edit with a photo editor. In this case, I opened the native RAW importing component of PainShop Pro. This, like almost all other RAW software, lets you choose the exposure compensation after the fact so that blownout whites like one would get with an Orange Tip butterfly can be rescued.
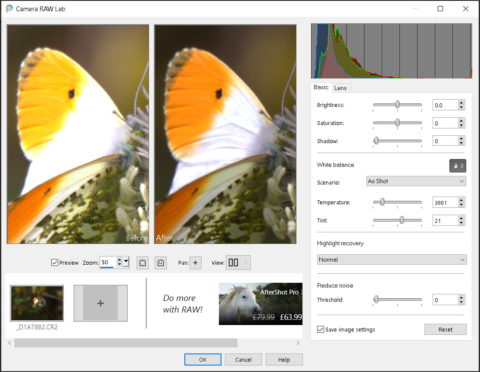
So, as you can see in the above before and after shot, I’ve set exposure compensation (highlight recovery, they call it in this software) to “normal” and it’s rescued some of the blownout details of the white part of the butterfly’s wing. RAWTherapee, Lightroom, and other tools let you do more sophisticated imports of RAW files. And, you can rescue the blacks too and then create a pseudo-bracketed shot or even an HDR if you wish with some software.
Once some rescue work has been done, I’ll usually then apply a few different adjustments to levels, clarity, vibrancy, and sharpness, as well as cropping and adding my logo.